
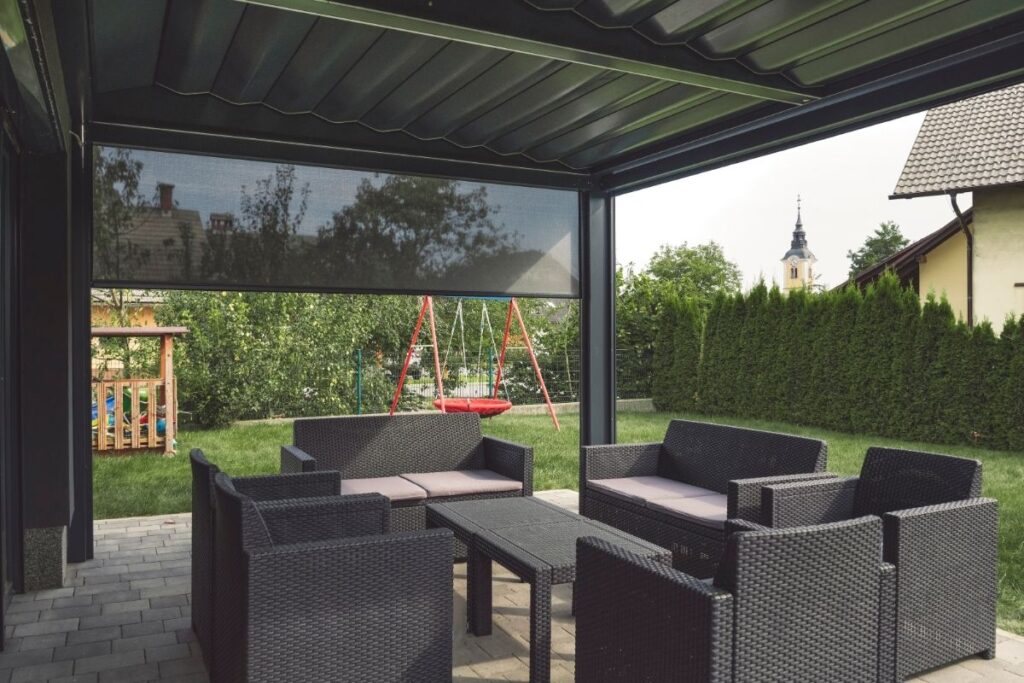
Most pergolas are not designed to keep rain out. Open rafters are the whole point of the structure, and the moment you decide you want a dry space underneath, you are asking a frame to do a job it was not originally built for.
That does not mean it cannot be done. It means the order of operations matters. Slope comes before material, structural capacity comes before slope, and sealing the joints matters more than the roofing panel you pick. Skip any of those and you end up with a roof that sheds water beautifully for one season, then starts dripping onto your table every time it rains hard.
This guide works through the decision in the order you should actually make it.
Step 1: Define What You Need the Roof to Do
Before pricing anything, get clear on which of three outcomes you want, because they lead to very different builds.
Water-resistant means you stay dry in light rain and the space dries quickly afterwards. A stretched canvas canopy or a shade sail with a decent pitch will do this.
Waterproof means no water gets through the roof plane at all, in any weather. This requires a continuous sealed surface, correctly lapped and flashed, with a drainage path.
Weathertight means waterproof plus sealed edges where the roof meets the house, plus protection from wind-driven rain coming in sideways. This is closer to a room than a pergola, and it usually needs side screens or partial walls.
Most people say waterproof and actually want weathertight. Being honest about that at the start saves you from building twice.
Step 2: Check the Frame Before You Add Anything
A pergola built for open rafters is carrying its own weight and not much else. Adding a solid roof changes three things at once: dead load from the panels, live load from water and snow sitting on the surface, and wind uplift on what is now a large sail.
Confirm the Pitch
Water needs somewhere to go, and flat roofs on pergolas are the single most common cause of leaks. Every material has a minimum slope, and going below it voids most warranties.
As a general guide, plan for the following minimums:
- Polycarbonate panels need roughly 5 degrees, which works out to about 90mm of fall per metre of run.
- Corrugated metal sheeting generally wants 5 to 10 degrees depending on the profile and sheet length.
- EPDM and single-ply membranes can go lower, around 1 to 2 degrees, but they still need positive fall to a drainage point.
- Fabric canopies need more, usually 15 degrees or above, or they will pond and stretch.
If your existing pergola is dead level, you will need to add tapered packers on top of the rafters or raise one beam. Do not try to solve a flat roof with extra sealant.
Confirm the Load Capacity
Rafter span, post size and footing depth all need to suit the new load. A wet snow layer can add well over 100kg per square metre, and that load arrives on a frame that may have been sized for shade cloth.
Get an engineer or your supplier to confirm capacity if you are in a snow region, if your posts are slimmer than 100mm by 100mm, or if the rafter span exceeds about 3 metres without support.
Add Purlins If You Need Them
Most pergola rafters run in one direction only, and roofing panels usually need cross support. Purlins fixed across the rafters give you fixing points at the spacing the panel manufacturer specifies, commonly 700mm to 1000mm for multiwall polycarbonate depending on thickness.
Step 3: Choose Your Roofing Method
There is no single best option here. Each one trades cost against light, noise, lifespan and how much work the install takes.
Multiwall Polycarbonate
This is the most common DIY route and for good reason. Multiwall polycarbonate is light, so it rarely requires frame upgrades, it transmits diffused light so the space underneath stays bright, and it cuts with a fine-tooth saw.
The downsides are noise in heavy rain, a plastic appearance up close, and a lifespan of roughly 10 to 20 years before UV degradation dulls the surface. Buy panels with a factory UV-protective layer and install that side facing up.
Corrugated Metal Sheeting
Metal is the most durable option in the mid-price range. Coated steel or aluminium sheeting will last decades, sheds snow well and handles wind loads better than plastic.
It blocks light entirely, which changes the space underneath significantly, and it is loud in rain unless you add an insulation layer. Many people run a mix, using metal over the seating area and clear panels over the section closest to the house.
EPDM or Single-Ply Membrane
If you want a genuinely flat-looking roof, a rubber membrane over a solid plywood deck is the reliable way to do it. One continuous sheet with no seams across the field means very few failure points.
This is the heaviest option, because you are adding structural plywood plus membrane, and it almost always requires a frame designed for it from the start. It also gives you a solid ceiling underneath, which you will want to line.
Retractable Canopy Systems
A motorised or hand-cranked retractable canopy gives you the flexibility that fixed roofing cannot. Open it for shade, close it for sky.
Quality varies enormously in this category. Cheap systems pond water in the middle and tear at the track within two or three seasons. If you go this route, buy a system with a tensioned track, a proper pitch and a waterproof rather than water-resistant fabric.
What Will Not Work
A few options get marketed as roofing and are not. Shade sails are permeable by design and will drip. Reed and bamboo screening filters light but holds moisture and rots. Standard tarpaulins pond, stretch and fail at the eyelets. None of these will give you a dry space in real rain.
Step 4: Install Polycarbonate Panels Correctly
Since this is the most common choice, here is the sequence that avoids the usual failures.
- Lay out your purlins at the spacing your panel thickness requires and check the whole plane is flat with a string line.
- Orient the panels so the internal flutes run down the slope. Flutes running across the slope trap water inside the sheet and the panel will fog permanently.
- Seal the top edge of each panel with solid aluminium tape and the bottom edge with vented breather tape, then cap both with a U-profile. This lets condensation drain out while keeping insects and dirt out.
- Drill fixing holes 3mm to 4mm larger than the screw shank. Polycarbonate expands roughly 3mm per metre for every 30 degrees of temperature change, and tight holes will crack the sheet.
- Fix with screws that have EPDM or neoprene bonded washers, tightened until the washer just compresses. Overtightening dimples the panel and creates a puddle around every screw.
- Join panels with H-profile connectors or overlap into a purpose-made glazing bar. Never overlap bare sheets and rely on sealant.
- Finish the ridge and any wall junction with proper flashing rather than filling the gap.
Step 5: Seal the Points That Actually Leak
Panels rarely fail in the middle. Almost every leak traces back to one of four junctions, and these deserve more attention than the roofing choice itself.
The wall junction is the biggest risk on an attached pergola. You need a flashing that tucks into or under the wall cladding and laps over the top of the roofing, not a bead of silicone across the joint. Where the wall is masonry, cut a chase and use a lead or aluminium counter-flashing rather than surface-mounting the flashing to the brick face.
Fastener penetrations come second. Every screw is a hole, and washers are what keep them dry. Check them annually, because thermal movement backs screws out over time.
Panel end laps come third. Laps must run with the slope, with the upper sheet over the lower one, and by the minimum lap the manufacturer specifies. Reversing a lap is an instant leak.
Post bases come last and get forgotten. Water running down posts pools at the base and rots timber from the ground up. Standoff post bases that lift the timber clear of the slab solve this permanently.
Step 6: Give the Water Somewhere to Go
A waterproof roof concentrates every drop of rain that used to fall across the whole footprint into one edge. On a 4 by 3 metre pergola, that can be several hundred litres in a single storm, dumped along one line.
Plan for it with a gutter along the low edge, a downpipe at one or both ends, and a discharge point that carries water away from the structure and away from the house foundation. Rain chains look attractive but only work for small areas with a drainage bed underneath.
If your pergola sits over a deck, check what happens to water landing on that deck edge. Repeated saturation in one strip will fail decking boards years before the rest.
Cold Climate Builds Need a Different Starting Point
In regions with real snow, waterproofing and structure stop being separate questions. Snow does not run off, it accumulates, and a roof that sheds rain perfectly can still fail under a February load.
Steeper pitches help snow slide, but sliding snow needs a safe landing zone, so keep it away from doorways and paths. Ice damming at the low edge is the second issue, particularly where a heated wall meets the roof plane. Metal sheds better than polycarbonate in these conditions, and polycarbonate becomes brittle in extreme cold.
This is also the point where many homeowners reconsider the structure itself. Comparing engineered snow load ratings from a Heavy timber Pavilion Canada supplier against a standard pergola specification usually makes the gap obvious, because pavilions are designed from the start with a solid roof, deeper beams and closer post spacing. Retrofitting a pergola to reach the same rating is often more expensive than starting with the right frame.
When a Pergola Is Simply the Wrong Structure
There is a threshold where waterproofing stops making sense. If you want a fully dry, year-round outdoor room with a solid ceiling, a fireplace or a mounted television, you are describing a pavilion, not a pergola.
The economics matter here. By the time you have added purlins, upgraded posts, poured deeper footings, installed a membrane roof and lined the underside, you are frequently within reach of what a purpose-built structure costs. Pricing a Heavy timber Pavilion USA build alongside your retrofit quote is worth doing before you commit, if only to confirm the retrofit is genuinely the cheaper path.
The finished result is different too. A retrofitted pergola usually reads as a pergola with something added on top. A pavilion reads as a building, with the roof proportions, beam depth and overhangs that make it look intentional from the yard.
Maintenance Keeps It Waterproof
A roof that was watertight on installation day will not stay that way without attention. Build a short routine into your seasonal jobs.
Twice a year, clear debris from the roof surface and gutters, since leaf litter holds moisture and blocks drainage. Once a year, walk the perimeter and check every fastener washer for compression, cracking or backing out. Also once a year, inspect the wall flashing for lifted edges and reseal only where the flashing itself has moved.
Every few years, check the condition of the panels themselves for UV chalking, cracking around fixings or lifted end tapes. Replacing one damaged panel early is far cheaper than dealing with rot in the frame after a season of slow leaks.
Questions People Ask Before They Start
Can I waterproof a pergola without replacing the roof?
Only if it already has a solid roof plane that has failed at the joints. If your pergola has open rafters, there is nothing there to waterproof, and you are installing a roof rather than sealing one.
Do I need planning permission or a permit?
Adding a solid roof often changes how a structure is classified, and many jurisdictions treat a covered structure differently from an open one. Check with your local authority before ordering materials, particularly for attached structures.
Is clear roofing worth the extra cost over metal?
It depends on what is behind the pergola. If the structure sits against a wall with windows, clear or opal panels protect the light reaching those rooms. If it sits in an open yard, metal costs less and lasts longer.
How much does it cost to waterproof a pergola roof?
Costs vary widely by region and size, but the general ranking holds everywhere. Fabric canopies sit at the low end, polycarbonate in the middle, metal slightly above that, and membrane systems highest once you include the structural deck.
Will a waterproof roof make the space darker?
Yes with metal or membrane, and only slightly with clear or opal polycarbonate. If light loss concerns you, run a mixed roof with clear panels along the edge nearest the house and solid roofing over the rest.
Start With the Frame, Not the Panel
The temptation is to start by shopping for roofing material, because that is the visible decision. It is also the one that matters least.
Confirm your pitch, confirm your frame can carry the load, add purlins at the right spacing, then pick a panel and seal the four junctions properly. Do it in that order and almost any of the materials above will keep you dry. Do it in reverse and you will be back on a ladder with a tube of sealant every spring.